
Tips For Lighting Film – Make Your Art Shine
Tips for Lighting Film – Make Your Art Shine
Written by Shailik Bhaumik
Lighting is an integral part of cinematography, and it’s one of the few areas of filmmaking that has infinite arrangements of set-ups. Quite like camera terminology, there are many variations of tools and lighting language. In short; it can get confusing. There is no one right way to employ lighting design. A scene could be lit several different ways by different cinematographers, each altering the mood and overall impact of the image. However, there is a basic list of lighting placement. Below is a list of primary light placement terminology, and the key points for that placement.
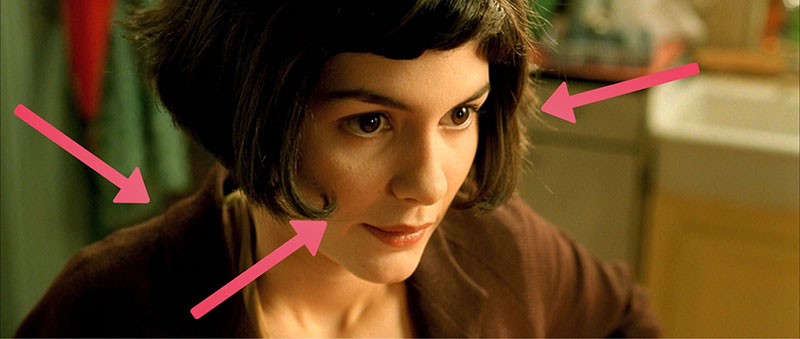
It’s important to note that there can be several terms for the same placement. For example; A backlight, rim light, and a hair light are interchangeable terms for having the light placed behind and above an actor. KEY LIGHT The key light is the light that registers most prominently in your frame. So, when you look at the image of Amelie above, you’ll see that the screen-right portion of her face is brightest. That’s the key light. FILL LIGHTS Quite simply, fill lights fill in the shadows of your frame. You’ll notice that the screen-left portion of Amelie’s face is in shadow, but with her features still plainly visible. That is a fill light at work. BACKLIGHT The backlight gives an edge light to the rear portion of your subject. Often, the backlight shoots down from a higher angle. You can see that Amelie has a light contour along her shoulders and the nape of her neck. You’ll generally want to flank your camera with your key and fill lights, spaced about 60 degrees on an axis from your camera.
Natural film lighting: Natural film lighting refers to using and modifying the light that is already available to you at your location. Before you shoot, you can take your camera to the location to see how well the natural light holds up. You can decide from there how what additional lights you might need, or how you might adjust the light. For example, you can use bounce boards for reflecting the light, or black flags for blocking it out. Cinematographer Emmanuel Lubezki maximized natural film lighting on Alejandro Inarritu’s The Revenant. In an interview, he speaks about using Magic Hour, or the soft light created by the sun at the end of the day, for specific moments.
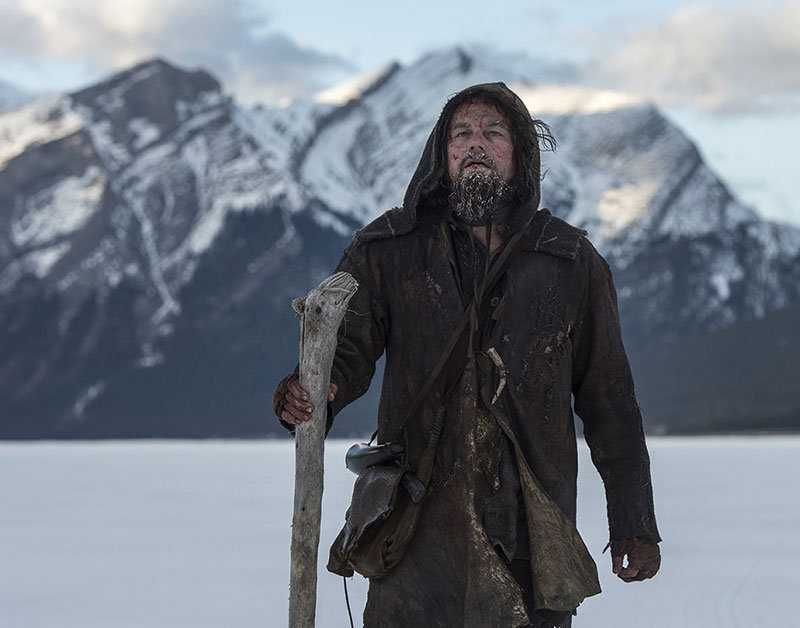
And, further, he talks about how the selection of locations, and how they appear at different times of the day, created appropriate moods for the shoot. It required a great deal of flexibility and preparation, but the results are stunning.
The cinematic types of lighting in film: Every cinematographer is an artist who makes creative decisions on how to guide the viewer’s eye within the frame using lighting equipment. Their applications are broad, but their creative interpretation is what makes their lighting cinematic (or not). Aperture recently published a helpful guide that shows examples of the kinds of decisions cinematographers make every day. They include: • Which props and scene elements should be emphasized… • Whose perspective we see the scene through, and how much light they should be able to see • How characters differ from one another in a frame • Which emotions are being expressed through the harshness of light, or its color Each of these decisions is then realized technically by planning and executing lighting setups to create the desired effect. But the cinematographer must dream up what these effects will be before setting up any lighting equipment.
Soft film lighting: When talking about how a scene should feel emotionally, one thing that is referenced by cinematographers frequently is how hard or soft the lighting should be. The hardness or softness of light concerns how large a light source is, and how it affects shadows on your subject.

HIGH KEY LIGHT: This is an effect created by heightening the key light and using fill lights generously. This keeps the lighting bright and balanced in your frame, creating almost no shadow. This balances the lighting from object to object in your frame -- which is known as your lighting ratio.

DIFFUSED OVERHEAD LIGHTING: You can soften a light source with diffusion materials like gels or Chinese lanterns to reduce shadows. This is great for conversation close-ups.
Hard film lighting: Conversely, smaller light sources, including bright sunlight, will heighten the shadows on your subject. Conservatively, this should be avoided. But it can also create dramatic effects, as was popularized in the classic film noirs, which featured suspicious and volatile characters.
KICKER LIGHT WITH SOFT FILL In this effect, the backlight hits the side of your subject’s face. It can create an angelic rim of light, while a very soft fill light keeps the face gently illuminated.
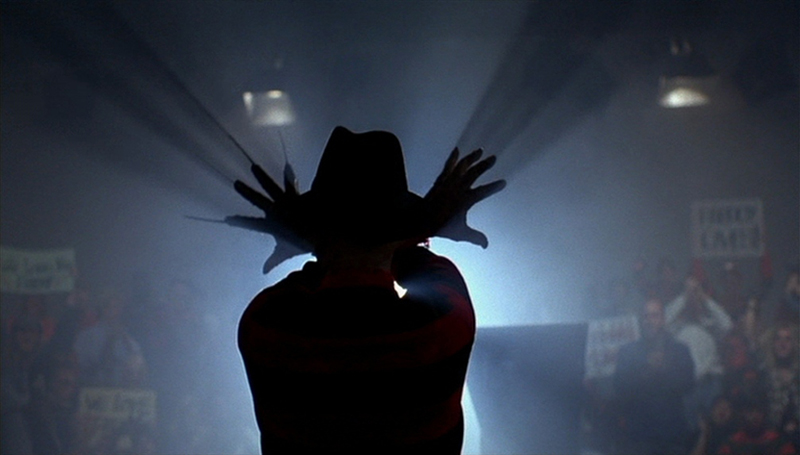
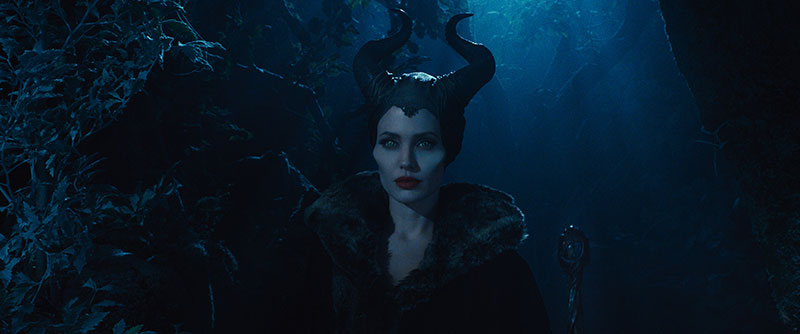
LOW KEY LIGHT Low key lighting refers to minimizing or eliminating the fill light your shot so that it is intentionally shadowy. This can create dramatic, suspicious, or even scary effects.
Motivated lighting: When cinematographers light a set, they always ask themselves where, within the scene, the light comes from. They might, for example, choose to take the practical lights that are already in a location and elevate their effectiveness. This is motivated lighting. Oscar-winning cinematographer Roger Deakins is known for the motivated lighting choices. Consider this shot from his work on The Assassination of Jesse James by the Coward Robert Ford.

As you can see, the lighting in this scene is motivated by the lanterns carried by the actors. When motivated lighting is done right, the audience is unaware of the artifice at work.
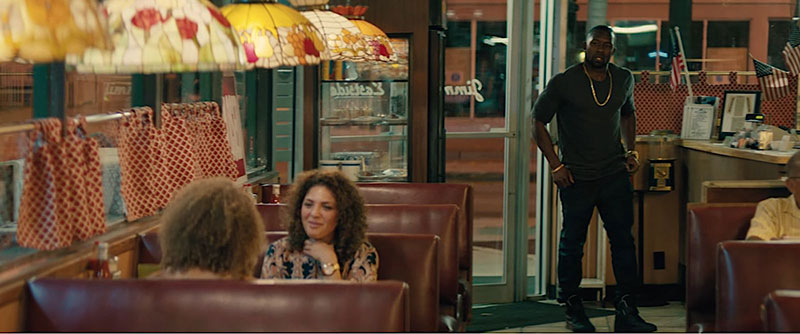
PRACTICAL SET LIGHTING: Often, using existing lamps and light sockets around the set can be used to light a scene. This is referred to as practical lighting and is particularly useful when you need to reveal wide portions of the set or move around it in long takes. This was the case in the diner scene in Moonlight. In an interview for TIFF Originals, DP James Laxton spoke about how he used practical set lighting to keep his location visible in wide frames. In essence, he swapped out the bulbs in the existing light sources around the diner to make them stronger. Since the scene reveals wide portions of their location, he relied on the practical sources, with some of the LED light mattes brought in as well for additional soft, balanced light.
Like all aesthetic principles, lighting choices have highly individualistic interpretations, based on the DP or director. These techniques are purely meant to maximize cues that can create evocative imagery. For further reading, read about out how cinematography techniques, beyond lighting, that can enhance your storytelling. And, as always, be sure to let us know in the comments which techniques have worked well for your shots and any we may have missed!
 Shailik Bhaumik is an award-winning filmmaker and entrepreneur. Known for his feature film “Dasein”, Shailik is the founder and Chairman of Human Lab Corporation, a Multinational Film Company whose mission it is to help Independent Filmmakers survive and thrive in this highly competitive industry. Shailik oversees worldwide operations including production, distribution, and marketing for HLC’s live-action films, as well as films released under the HLC banner.